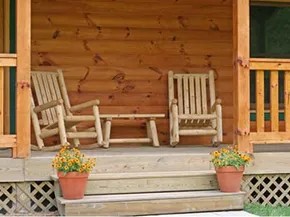
There’s a railing. You’ve got the swing. The porch feels complete. But this is not the case. You can’t get off it.
Requires stairs.
Building them sounds simple until one miscalculation turns an inviting entrance into a tripping hazard. It’s not just a pile of wood. This is all about physics. It’s all about geometry. If you have never owned a circular saw before, you may want to hire a professional. But if you have the means, follow this guide to build a porch staircase that actually works.
Important math
People think design is aesthetics. it is not. Design is survival.
A poorly designed staircase is a nightmare. Think steep basement steps on the steep stairs in your basement. Or the wide, low marble stairs in the old library, which were a waste of space. You don’t want that on your porch. Accuracy is required.
Before you buy a single board, do the math. If algebra is a distant memory, pause here. You may want to revisit high school geometry before continuing.
The logic is:
- Measure the total rise. This is the vertical distance from the ground to the porch floor. Assume 36 inches.
- Divide by 7 inches. This is the ideal step height. Dividing 36 by 7 gives us 5.14. Round down to five. Five steps are required.
- **Calculate the actual riser height. ** Divide the total riser height (36 inches) by the number of steps (5). It is 7.2 inches. Round to the nearest quarter inch. It is 7 1/4 inches.
- Find the run width. Use a stair chart. A 7 1/4 inch rise defines an 11 inch run. This is the depth of each step.
Your staircase now has a blueprint. 5 steps. 7 1/4″ high. 11″ wide.
Construction Basics
Once you’ve obtained your permits and checked your local ordinances, you’re ready to start swinging the hammer.
1. Install the Stringers
The springs are the backbone of the stairs. They are the cut-out boards that support the treads and risers. Place it according to the measurements. Secure them with lag screws. These are no ordinary wood screws. heavy-duty, square-headed fasteners designed to hold weight.
2. Cutting the riser
Risers are the vertical boards between steps. Cut according to the calculated height. Screw them into the stringers.
3. Install the Treads
The wear surface is the horizontal part of the walking frame. Screw them in at the ends and down the middle for stability. Wobbly treads are dangerous treads.
4.Add railing
Don’t skip this. Safety first.
Install a post before you put on the lowest tread. You will need to cut this tread to fit around the post. Next, attach the railing. A simple piece of wood attached to the top pillar of the porch is enough. You can also add another rail near the step to reinforce it for a better grip.
Shortcuts and Caveats
You can buy precut stringers. Home centers sell them in a rack.
This saves time. It won’t take all the jobs.
You may need to cut it to fit specific stair dimensions. Or the ground may not be flat. If the soil is not level, it must be leveled again. It’s a dirty job. This is drilling. It’s sweat.
Building porch steps is a weekend project if you’re up for it. This is not a Sunday afternoon hobby.
Take a tape measure. Use a safety helmet.
The country is waiting.
Actual cost of bypassing code reviews
You might think you’ve already measured it. Stringer is cut. The beams are separated from each other. But if you don’t check your local building department’s specific requirements for outdoor stair construction, you may regret it when the inspector comes. Even worse, guests can slip on risers that are too high.
Most residential zoning codes require a maximum height of 7.75 inches and a minimum run of 10 inches. Some jurisdictions are stricter. They want that 7-inch rise. They wanted an 11 inch tread depth. If you build it as little and loosely as possible, the stairs will feel uneven. Your knees will take the hit. This is not just a question of legality. It’s about human biomechanics.
Why string spacing is important
It’s not just about bolting wood together. Creating a load-bearing system. Standard practice for wooden stairs recommends that the stringers be spaced 16 to 24 inches apart. If you’re using pressure treated 2×10, 24 inches is usually a safe choice for residential use. Want to go wider? The treads might sag. You’ll feel it every time you walk up.
Consider the materials. Aluminum stringers are light. They don’t rot. It is also expensive. Wood is cheap, but requires maintenance. If you live in a humid climate, treat the wood. Seal the cut ends. Otherwise, moisture can penetrate inside and destroy the integrity of the structure from the inside.
Anchor: How to fix the top
Protecting the top of stairs is an area that DIYers often struggle with. Simply nailing it to the frame of the deck is not enough. A ledger is required. It must be bolted into the house’s framing, not just the siding of the house. Use construction screws or carriage bolts. Washers are not negotiable. They spread the burden.
“If the top attachment fails, the whole thing comes down. That’s it.”
Check for rot before drilling holes. If the beam of the rim is soft, it will not be able to hold the bolt. You need to use new wood or strengthen the frame. This is not a place to cut corners. If the stairs are not properly grounded and secured, the wind can blow them away.
Drainage and slope
Water is the enemy of wood. If the stairs are flat on the ground, water collects. It freezes. It expands. The wood swells. The stairs are cracked. The tread should be slightly sloped (about 1/4 inch per foot). This helps direct water away from the riser.
When using a composite decking, the inclined surface is baked into the material. But wood? You need to cut it at an angle or shim it. Don’t ignore this. Now it only takes minutes and saves you months of sanding and sealing.
Final Checks Before the First Step
Check everything before painting, staining or leaving the job site.
– Are all screws flush? Protruding heads catch toes.
– Is the handrail secure? Most codes require handrails when building stairs that are more than 30 inches tall.
– Does the tread feel consistent? Walk up and down. If one step feels different, correct it immediately.
Tools used for assembly – circular saw, spirit level, drill


