Your oil furnace is about as reliable as it gets, but it still needs a little TLC before the temperatures drop. Neglecting the filtration system is a quick way to invite sputtering burners, poor heat output, or worse—complete shutdowns in the middle of a freeze. The golden rule is simple: change or clean your filters three to four times a year. That means hitting them at the start of the heating season, midway through, and then again as the season winds down. It’s a small effort that pays off in consistent comfort and longevity for your equipment.
Replacing the Primary Oil Filter
Most homeowners know the main filter sits somewhere in the line between the tank and the burner, but the actual process gets glossed over. Let’s fix that. You need to stop the fuel flow before you even think about unscrewing anything.
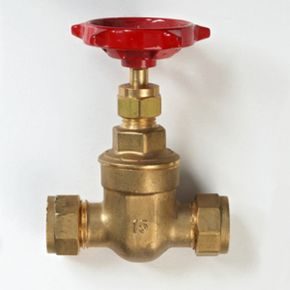
1. Shut off the supply. Locate the oil shutoff valve on the line running from your fuel tank to the filter housing. Turn it clockwise until it stops. This prevents a spill when you open the housing.
2. Remove the filter cup. Depending on your model, the filter might be a disposable cartridge or a permanent metal mesh. Unscrew the bottom cup of the housing. If it’s tight, you might need a strap wrench, but be careful not to crush the metal. Pull the old filter out.
3. Swap it out. If you’re using a disposable filter, grab a new one that matches the size and type exactly. Wrong specs can lead to pressure issues. If you have a permanent filter, you’ll need to clean it. Check your furnace manual for the specific cleaning method, but generally, you’ll be scrubbing off soot and sludge.
4. Gaskets are non-negotiable. Here is where people cut corners and end up with leaks. Throw away the old gasket from the filter cup and use a new one. It costs pennies and saves you from a messy oil stain on your basement floor.
5. Reassemble and restart. Screw the housing back on tightly. Open the shutoff valve. You might need to bleed the air out of the line if the burner doesn’t fire immediately, but that’s a topic for another day. For now, just make sure there are no drips.
Don’t Forget the Pump Strainer
The main filter catches the big stuff. The pump strainer catches the fine particles that could clog the nozzle. It’s often overlooked because it’s hidden inside the burner assembly. Cleaning it during your seasonal maintenance takes only a few extra minutes.
1. Access the pump. Locate the oil pump attached to the burner/blower unit. You’ll see a small housing where the oil line enters. Unbolt the cover of this housing. Keep track of those bolts—they’re easy to lose if you’re working in a cramped space.
2. Remove the screen. Lift the cover off. There will be a thin gasket around the rim. Pull it out carefully. Inside, you’ll find the strainer. It looks like a tiny cylindrical wire mesh cup. Remove it.
3. Soak and scrub. Don’t just wipe it off. Sludge in these strainers is stubborn. Soak the mesh screen in kerosene for several minutes to


