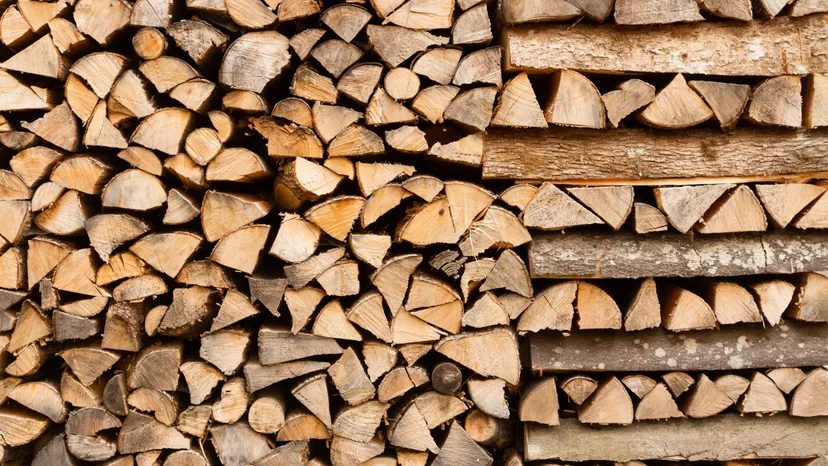
Stacking wood isn’t just about creating a pile in your yard. It is a discipline. A poorly stacked woodpile rots before you even light a match. A well-stacked one burns hot, clean, and ready for the first frost. If you rely on wood for heat or cooking, treating stacking as an art form pays off. You get stability. You get dry wood. You get a cleaner looking yard.
Here is how to do it right.
Choosing the Right Spot
Location dictates success. You need a spot with good air circulation. Sunlight helps too. Moisture is the enemy of good firewood. If the ground is wet, the wood absorbs it. Keep the pile far enough from your house to avoid fire hazards, but close enough that you don’t have to haul it through snow in January.
Accessibility matters. If it is a nightmare to reach, you won’t use it efficiently.
Preparing the Base
Never put wood directly on the ground. The bottom layer will soak up moisture from the soil. Capillary action is real. Use treated wood boards or cinder blocks to create a raised base. This simple step keeps the lowest logs dry and extends the life of your entire stack.
The American Stacking Method
This is the most common technique for a reason. It is straightforward. It works.
- Lay down a base of untreated logs parallel to each other.
- Stack split wood in straight, horizontal rows.
- Alternate the direction of each layer. Cross the logs over the previous one.
This crisscross pattern creates a self-supporting wall. It is stable. It is efficient for limited spaces like against a shed wall or inside a woodshed. Beginners should start here.
“The American method relies on gravity and interlocking layers to create stability without the need for external supports.”
The Norwegian Stacking Method (Holz Hausen)
If you have a lot of wood and limited space, look at the Norwegian method. It creates a round, beehive-shaped stack.
Start with a small circle of split logs. Build outward and upward in concentric circles. Fill the center with logs to prevent the pile from collapsing inward. The round shape allows air to flow through the gaps. This maximizes airflow and speeds up seasoning. It is efficient for large quantities.
The End Pillars Stacking Method
This method prioritizes stability for tall stacks. It reduces the risk of collapse.
- Build two towers (pillars) using uniformly shaped logs.
- Lay logs parallel but alternate the direction for each layer.
- Build up to about a dozen levels.
- Keep the towers several feet apart.
Fill the space between the pillars with split firewood. Orient the cut ends toward the prevailing wind. This directs airflow through the center of the stack. It is a robust solution for high-volume storage.
The Amish Method (Shaker Stack)
The Amish method is distinct. It looks like a spiral.
Arrange logs so they touch at one end and spiral outward. This creates larger gaps at the opposite end. The result is a round, visually pleasing stack. It holds more wood than a traditional rectangular pile. The design repels water. It dries faster due to the increased surface area exposed to air.
The German Method (Holzmiete)
Also known as the beehive method, this is ideal for small areas.
- Form a circular base layer.
- Stack wood in a spiral pattern upward.
- Taper the stack toward the top.
The shape shelters the wood from rain. Air circulates freely. It saves space. It is a compact solution for urban or suburban yards.
Why Seasoning Matters
Seasoned wood burns better. It produces less creosote. It is safer. Proper stacking accelerates this process. You need ample airflow to every piece. Tight stacks trap moisture. Loose stacks dry out. The goal is balance.
Airflow and Stability
Leave gaps between logs. Do not pack the wood too tight. Techniques like the Amish method focus on maximizing airflow. Stability is key. Use the end pillar method for higher stacks to prevent accidents. A falling woodpile is dangerous.
Maintenance
Inspect your woodpile regularly. Rotate the wood to use the oldest, most seasoned wood first. Cover the top with a barked firewood cover or metal roofing. Keep the sides open. This protects from rain while allowing air to circulate.
Safety First
Ensure the stack is stable. Use a level base. Avoid overloading. Firewood is heavy. A collapse can cause injury. Stay aware of your surroundings.
Wood stacking is practical. It is also aesthetic. A neat stack adds to the character of your outdoor space. It signals preparation. It signals self-reliance.
Start with the American method. Master the basics. Then experiment with the Norwegian or German techniques. See what works for your climate and space. The wood will thank you. And so will you, when the temperature drops.
There is always more to learn. The next step involves understanding wood species and their burn times.
Fixing the Messy Pile
Moisture. Rot. Insects. It happens when you stop caring about how the wood sits. You think you’re just stacking logs, but you’re building a habitat for bugs and mold if you get it wrong. The fix isn’t magic. It’s geometry.
If your logs are weird shapes—split irregularly or just awkwardly sized—forget the standard tidy rows. Try the German method. It sounds complex, but it’s just interlocking. You lay two long logs side by side. Then two shorter ones across the top, perpendicular to the first pair. Repeat. The result is a self-supporting tower that breathes better than a flat stack and doesn’t topple over when the wind picks up.
Airflow is King
You can have the prettiest woodpile in the neighborhood, but if the air can’t get through it, you’re cooking with damp logs. Damp wood doesn’t burn. It smokes. It ruins your chimney. It’s a nightmare.
Every method we talked about yesterday—the Norwegian teepee, the end-pillar structure, the classic rectangular stack—shares one non-negotiable rule: space. You need gaps. You need cross-bracing. If you’re using the German technique, the natural cross-hatching is the airflow system. If you’re using standard rails, leave an inch between each layer. Let the sun hit the bark. Let the wind dry it out.
Maintenance Over Time
Stacking is only half the job. The other half is watching it. Check the bottom logs monthly. If they’re touching the ground, lift them. Use pallets. Use concrete blocks. Never let firewood sit directly on soil. It wicks moisture up like a sponge.
Inspect for signs of pests. Termites love damp, decaying wood. If you see frass (sawdust-like droppings) or hollow-sounding logs, pull them out immediately. Burn them or dispose of them far from your main stack. Don’t let a small infestation become a structural problem.
Aesthetics vs. Function
Look, a well-stacked pile does look better. It signals order. It signals that you’re prepared for winter. But don’t sacrifice function for looks. A wobbly stack that looks pretty in January might collapse in February and bury you in splinters.
Prioritize stability. Prioritize dryness. The aesthetic comes naturally when you respect the materials. Stack it tight enough to hold together. Loose enough to breathe. Check it often. Fix the issues before they become disasters.
Your woodpile is a living system. Treat it like one.