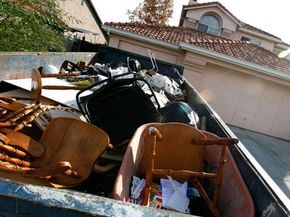
You are likely dreaming about wide-plank oak or sleek subway tile for your new renovation. The idea of ripping out that ugly linoleum or cracked ceramic feels like progress. It is satisfying to see the old stuff go. But before you call the wrecking ball, consider this: that “trash” might be your next project’s best material.
The Environmental Protection Agency estimates that construction waste generates 136 million tons of debris in the United States annually. This makes up 25 to 40 percent of the national solid waste stream. Landfills are not the only issue. Solvents and chemically treated wood leach into soil and water. The impact is severe.
Enter green demolition. Also known as deconstruction, this method replaces the bulldozer with careful dismantling. Trained crews harvest reusable items. These materials return to the marketplace. The process takes longer. It costs more upfront. Yet the environmental benefits are clear. We will look at the costs and benefits in detail.
Green Demolition and Material Recovery Facilities
Deconstruction is a booming industry. It persists even in a weak economy. The method keeps roughly 80 percent of construction waste out of landfills. However, it costs about $10,000 more than standard demolition. Labor drives this cost. Carefully removing fixtures takes time. A wrecking ball does not.
You can recoup some expenses. You save on landfill fees. You may receive tax credits for donating materials. It is a trade-off between immediate cash flow and long-term value.
LEED Certification also plays a role here. The US Green Building Council developed these standards for sustainable construction. Projects that divert at least half their waste earn credits. This adds value to the build.
State laws vary on waste separation. Connecticut requires cardboard and scrap metal to be separated. Onsite separation involves specific bins. Materials arrive at processing facilities in better shape. They sell for higher prices.
Alternatively, you can use Material Recovery Facilities. These plants sort bulk deliveries. You use one large container. Sorting fees apply. But you save time on-site. The math often works out.
San Diego has made this mandatory. Developers must pay a deposit for permits. They get it back only if they recycle or reuse 50 percent of waste. The pressure is on.
Once crews are trained and methods are standardized, the cost gap narrows. The real question becomes what you are throwing away.
Think Twice Before You Toss
Drive-by contamination is a hidden cost. Passersby toss trash into construction dumpsters. This can account for 30 percent of the total volume. It creates extra hauling expenses. Securing the site matters.
The next step in this series explores exactly which materials can be recycled. We will break down what stays and what goes.
The Hierarchy of Waste in Construction
Everyone tosses around the “Reduce, Reuse, Recycle” mantra until it loses all meaning. It’s easy to treat them as one big green bucket. But in construction, treating them as identical is expensive. Recycling is actually the last resort. It involves breaking down materials to make something new, which costs money and energy. Reducing and reusing? Those are the moves that save cash and cut waste at the source.
Reduce Waste Through Smart Planning
Reduction isn’t magic. It’s just good math. Construction materials come in standard sizes. If you plan your project around those dimensions, you stop creating scrap. Think about it. You’re less likely to cut a 2×4 into useless slivers if you measured twice and ordered the right length to begin with.
Wood, drywall, and cardboard are the usual suspects. They make up about 75% of job site waste. If you can keep three-quarters of that pile out of the dumpster, you’ve won half the battle.
Reuse: Where the Real Savings Live
Reusing materials is where your conscience (and your wallet) gets the biggest win. It requires effort. You have to harvest materials properly instead of letting them sit in a pile waiting to be hauled away. If you treat demolition like a salvage operation, you pull value out of the debris.
Consider what stays intact:
- Structural wood floors and beams
- Doors and windows with good glass
- Appliances and fixtures that still work
- Tile and carpet in decent condition
- Roofing materials and aluminum siding
- Bricks and pipes
Don’t just toss them. Look for the next life of each item.
Brick and drywall scraps aren’t trash. They make excellent backfill for landscaping or foundation work. Shingles that aren’t cracked can be pulled and reused on a shed or a new roof section. Wood beams? They can go into another home’s renovation or become sturdy raised beds for a vegetable garden.
Salvaged wood flooring is a different beast entirely. It’s highly sought after. Renovators restoring older homes pay a premium for original details. Many sizes of old floorboards aren’t manufactured anymore. You can’t buy them new. You have to find them in existing houses. That scarcity drives up the value of keeping them intact during a tear-out.
Recycling: The Expensive Last Step
Recycling is the least desirable option for practical reasons. It’s not just about wanting to be green. It’s about logistics. If the recycling facility is fifty miles away, transportation costs eat your budget. The processing itself is costly. Not everything can be recycled, either.
But it’s better than the landfill. Drywall scraps can be turned into textured wall sprays, acoustical coatings, or even agricultural soil products. Roof shingles? They get ground up and used in asphalt pavement. Cardboard boxes from material shipments can be pulped and turned into new packaging.
The infrastructure exists. But it’s inefficient compared to just keeping the material in use.
Managing Home DIY Removals
When you tackle this in your own home, the same logic applies. Sort before you sweep. Separate the salvageable from the scrap. Keep the reusable items clean and dry. Store them safely so they don’t get damaged while you finish the rest of the job. The effort of sorting is the only difference between a dumpster fee and a profit.


Hiring a professional deconstruction crew sounds like a dream for the eco-conscious homeowner. It isn’t. It’s expensive. And it’s often overkill for a small remodel. If you’re tightening your belt, you don’t need a team of experts to keep your project green. You just need to stop tearing things out when you don’t have to.
Cover It Instead of Tearing It Out
Think about the last time you ripped up an old floor. Did you enjoy the back pain? Probably not.
There are shortcuts. If your tile backsplash is dated but structurally sound, don’t bust it out. Install new tile over the old layer. You save on landfill fees. You save on labor. Your spine stays intact.
Popcorn ceilings are another nightmare. Scraping them off is messy, risky, and exhausting. Instead of the crowbar approach, simply hang thin sheets of drywall over the texture. You get a smooth, modern look without the dust clouds. It’s a simple hack that keeps massive amounts of debris in the bin where it belongs—or rather, keeps it out of the truck.
Lead Paint Safety First
Old homes come with hidden costs. If your house was built before 1978, there is a good chance lead paint is hiding beneath the surface.
Don’t guess. Buy a test kit from your local hardware store. These are cheap and definitive. If the test comes back positive, you have a decision to make.
Covering up lead paint is safer and often cheaper than removing it.
Painting over it or installing wallpaper is the safest bet for DIYers. Sanding or stripping releases toxic dust into your lungs and your home’s air circulation. If you absolutely must remove the drywall or plaster, stop. Call a professional. Lead abatement is not a weekend project. It’s a hazard.
Donate and Salvage Materials
Once you’ve covered the hazards and done the work, you’re left with piles of good materials. Don’t let them rot in a dump.
Habitat for Humanity ReStores are your best friend. They accept lumber, unused paint, large sheets of drywall, and old appliances. It’s free to drop off, and it helps the community.
Salvage yards are also goldmines. They buy and sell doors, windows, and fixtures from older homes. If you’re pulling out original wood doors, they might be worth more than the scrap metal value. Check local yards first.
For smaller items, list them on Craigslist or Freecycle. One person’s junk is another’s garden edging. That stack of bricks? Someone wants them for a patio. That pile of wood trim? A crafter needs it for a project.
The Art of Reclaimed Materials
There is a whole subculture of artists and makers who thrive on reclaimed materials. They look for the character in the old stuff. The nail holes. The weathering. The history.
If you have oddities left over—shingles, flooring, beams—post them online. You might just find a buyer who turns your waste into a wallet or a piece of furniture. It’s not just about saving money. It’s about keeping resources in the loop.
But here’s the thing. Most DIY guides stop at “donate this.” They don’t talk about the mental load of deciding what to keep, what to throw, and what to cover up. It’s a constant negotiation with your own space.
You’re walking a line between efficiency and ethics. Between saving your back and saving the planet. Sometimes you cover the tile. Sometimes you donate the wood. Sometimes you just ignore the lead and hope for the best.
Which route are you taking for your next remodel?